In tema di zanzariere o, più nello specifico, di rete per zanzariere, capita saltuariamente di dover provvedere alla sostituzione per una rottura accidentale o per l’usura che va a ledere la dotazione originaria.
I maggiori produttori di zanzariere possono fornire tante differenti soluzioni a seconda dei gusti e delle necessità.
La classica rete per zanzariere è grigia, si tratta del modello più utilizzato sul mercato. La rete standard è resistente e robusta, contraddistinta dalla presenza delle tradizionali “fettucce” laterali che consistono in nastri saldati sui lati per garantire una durata maggiore alla zanzariera, evitando strappi o rotture accidentali.
Ci sono poi i modelli più particolari, come per esempio il Bellavista che permette una visuale esterna migliore oppure la rete Bicolore che, per la sua specifica tramatura a strisce, consente di essere notata più facilmente da animali e bambini che, in questo modo, evitano di sbatterci contro.
Tra i modelli acquistabili sul mercato, c’è anche la rete antipolline: grazie alla fitta trama, permette agli agenti allergeni di rimanere all’esterno. La rete in Alluminio, presente all’interno delle zanzariere fisse, ha la caratteristica e il vantaggio di risultare inattaccabile dai roditori.
All’interno delle gamme si trova, inoltre, la rete Pet-Antigraffio, particolarmente apprezzata dai possessori di gatti e di altri animali domestici perché è in grado di resistere ai graffi.
Ci sono diversi siti che offrono filmati o foto, quali punti di riferimento per non sbagliare nel momento in cui si decide di sostituire la rete delle zanzariere a rullo per rottura accidentale o usura.
Vediamo, passo dopo passo, come sostituire la rete di una zanzariera verticale per finestre.
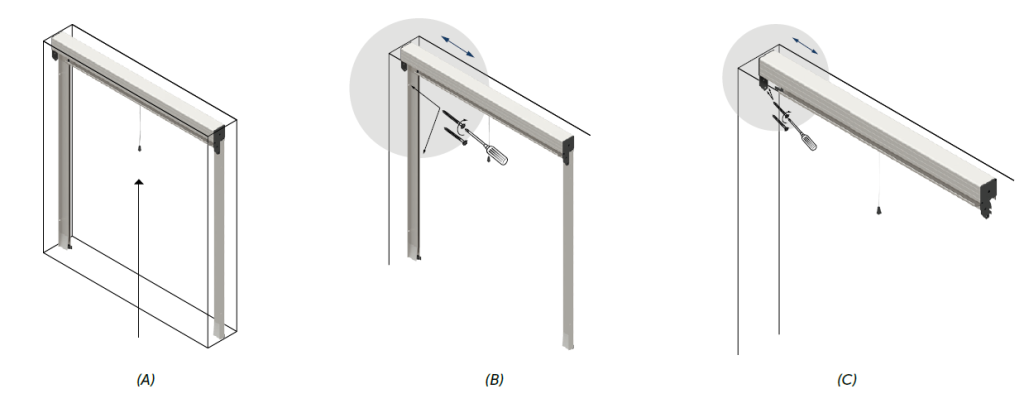
Il primo step è fare in modo che la zanzariera sia completamente avvolta.
Con un cacciavite occorre smontare i due profili laterali dal momento che sono avvitati al muro.
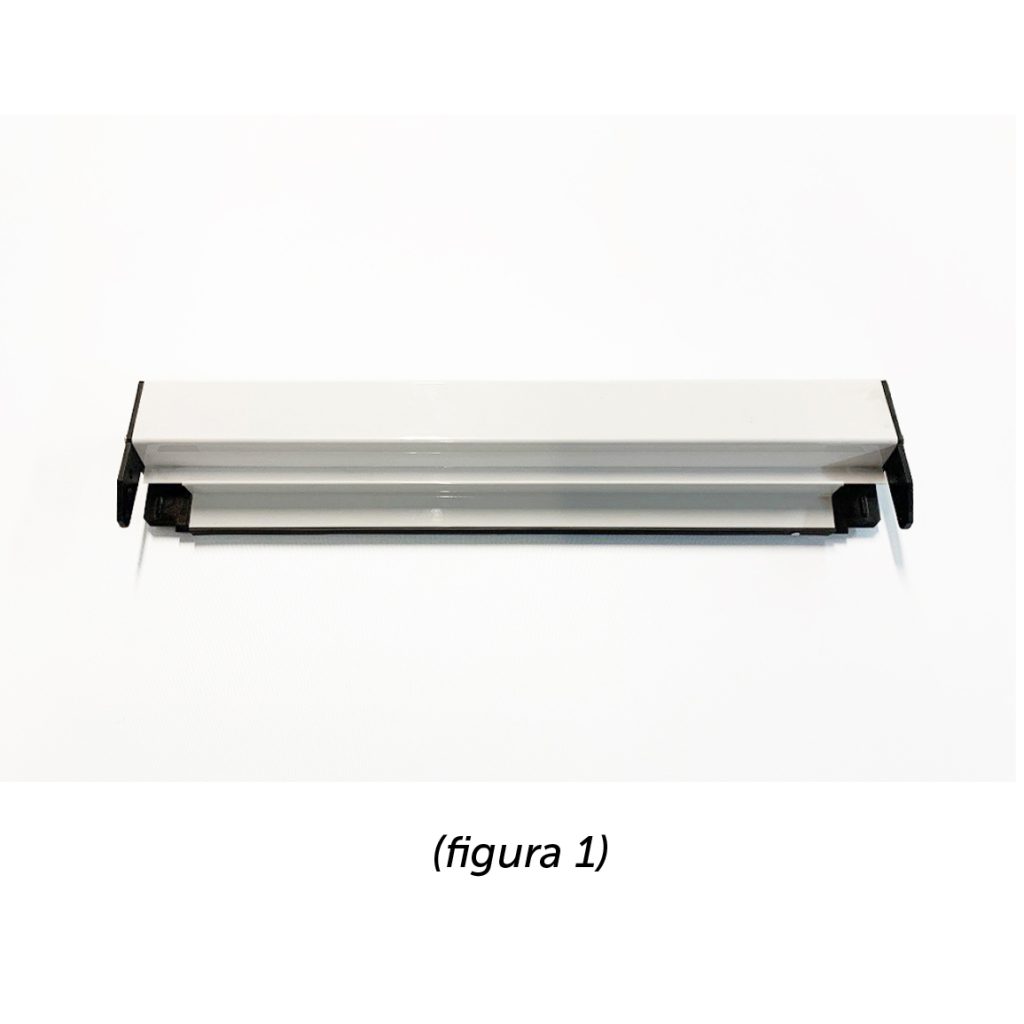
Si passa quindi al cassonetto: partendo dalle staffe che lo tengono inserito. Il consiglio è quello di rimuoverle con delle pinze. Ora il rullo può essere estratto dal vano in cui era alloggiato e adagiarlo su un panno o lenzuolo per non danneggiare il pavimento o il tavolo di appoggio (figura 1).
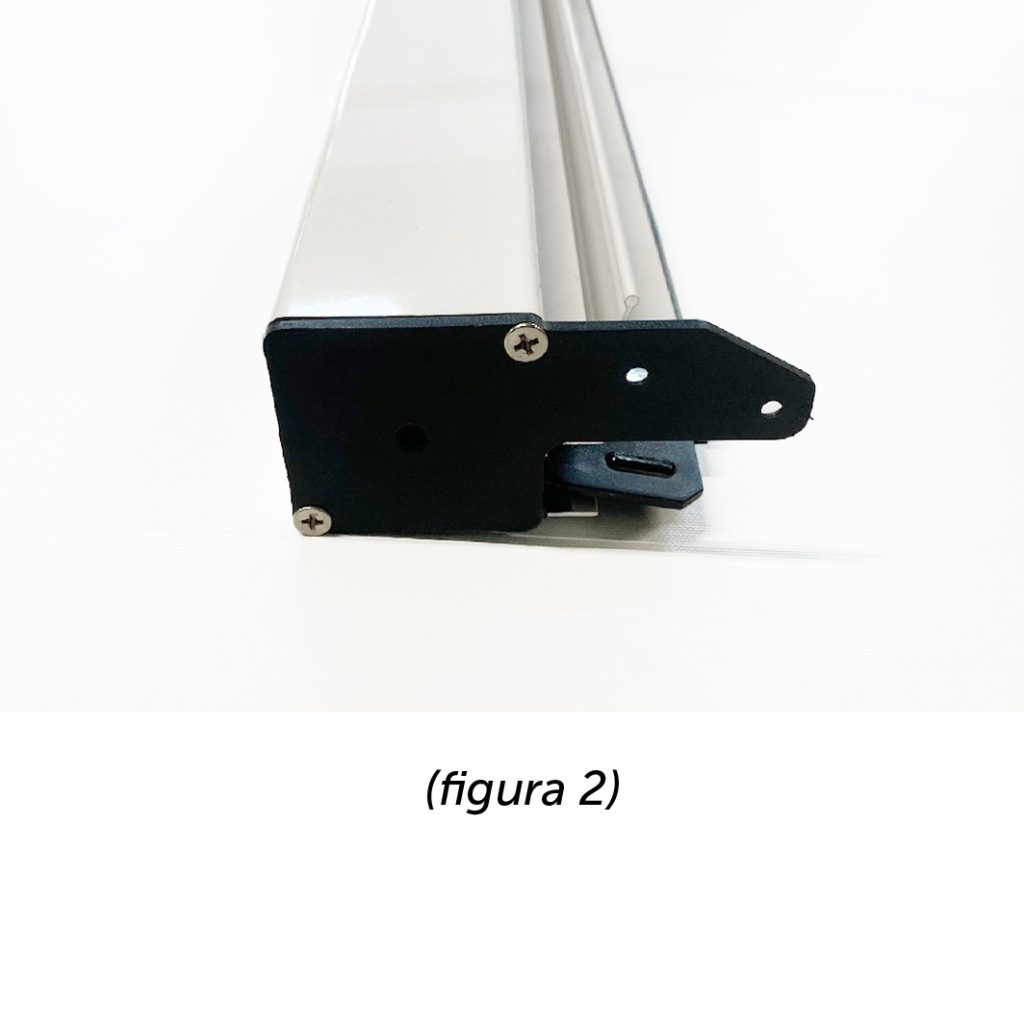
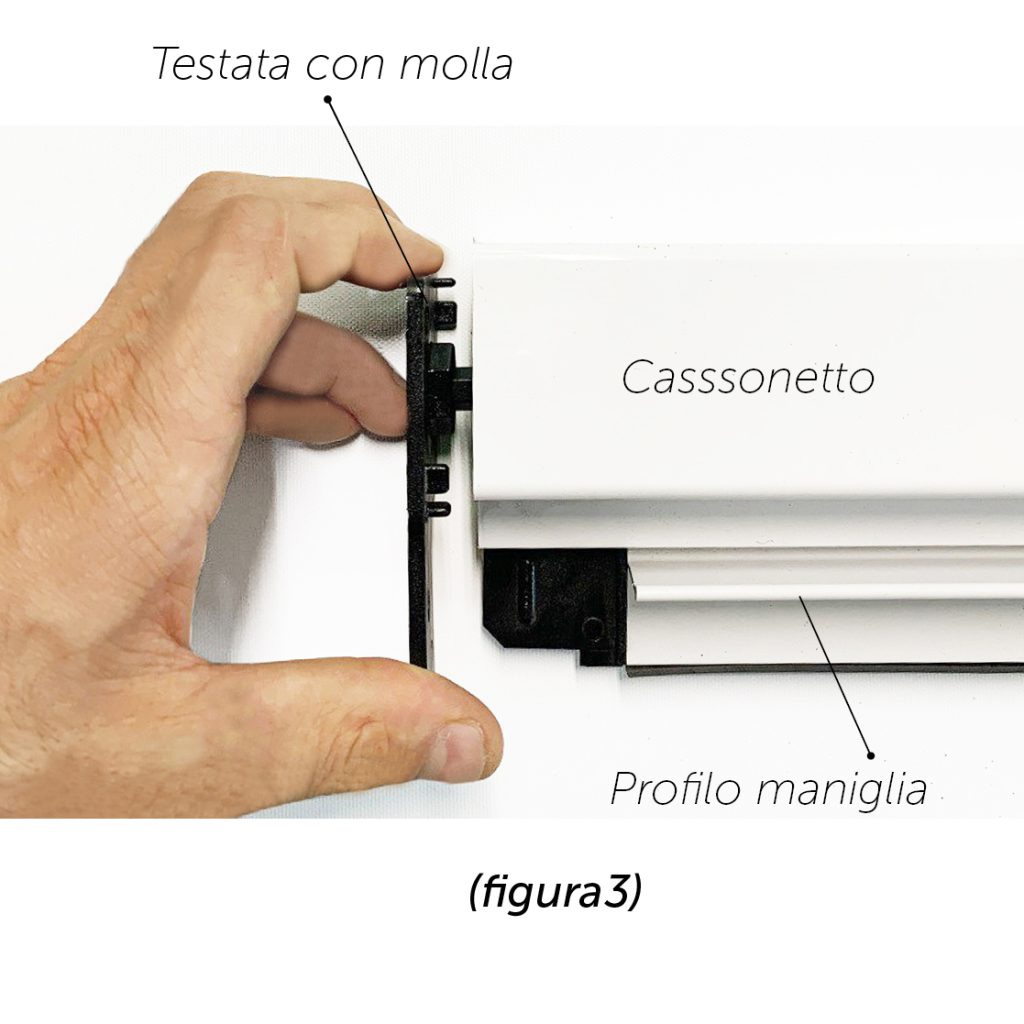
Il quarto passaggio consiste nello svitare le testate laterali (gli accessori in plastica ai lati del cassonetto di figura 2 ndr) del rullo mediante l’ausilio di un cacciavite, stando attenti a non fare scattare la molla. Consigliamo di svitare la testata a sinistra dove è presente la molla di richiamo (nelle zanzariere a molla).
Una volta tolte le viti, sfilate la testata dal cassonetto facendo molta attenzione perché, la presenza della molla fa ruotare il componente (figura 3).
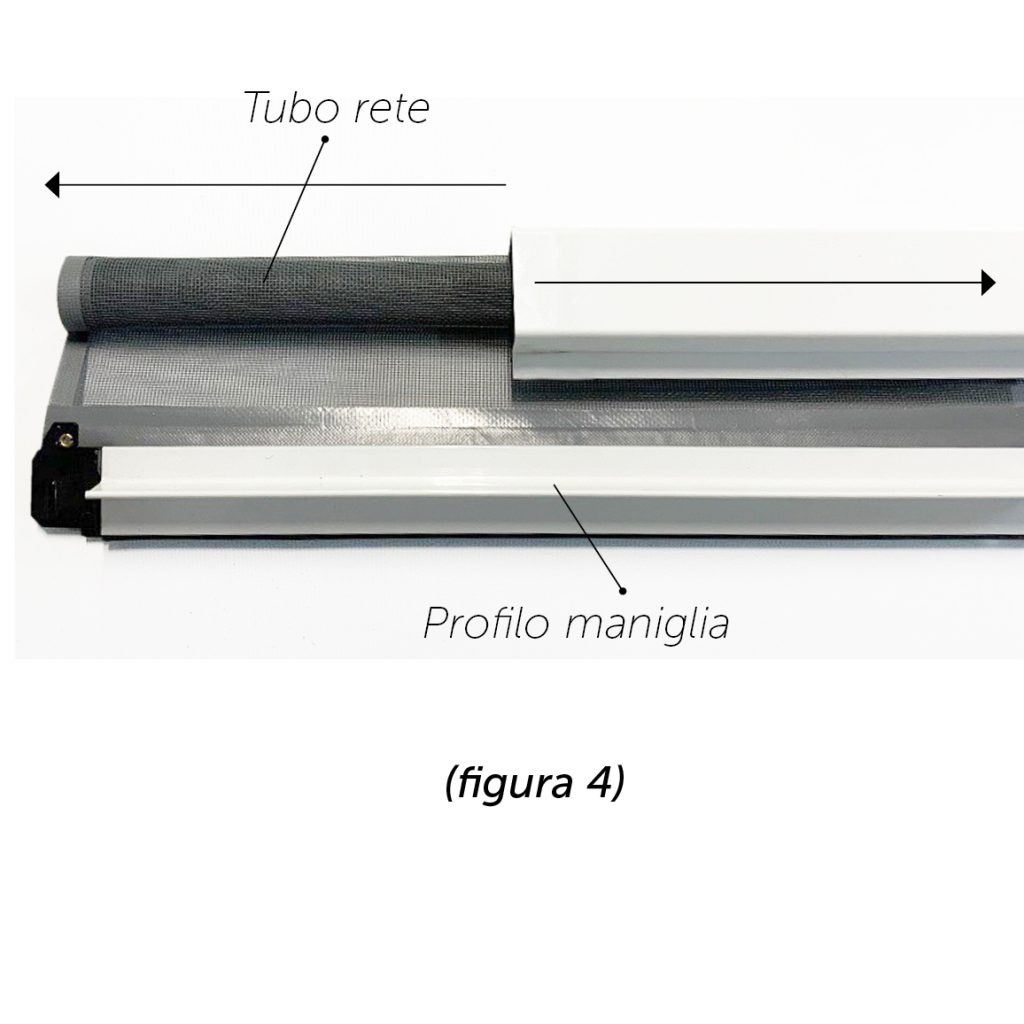
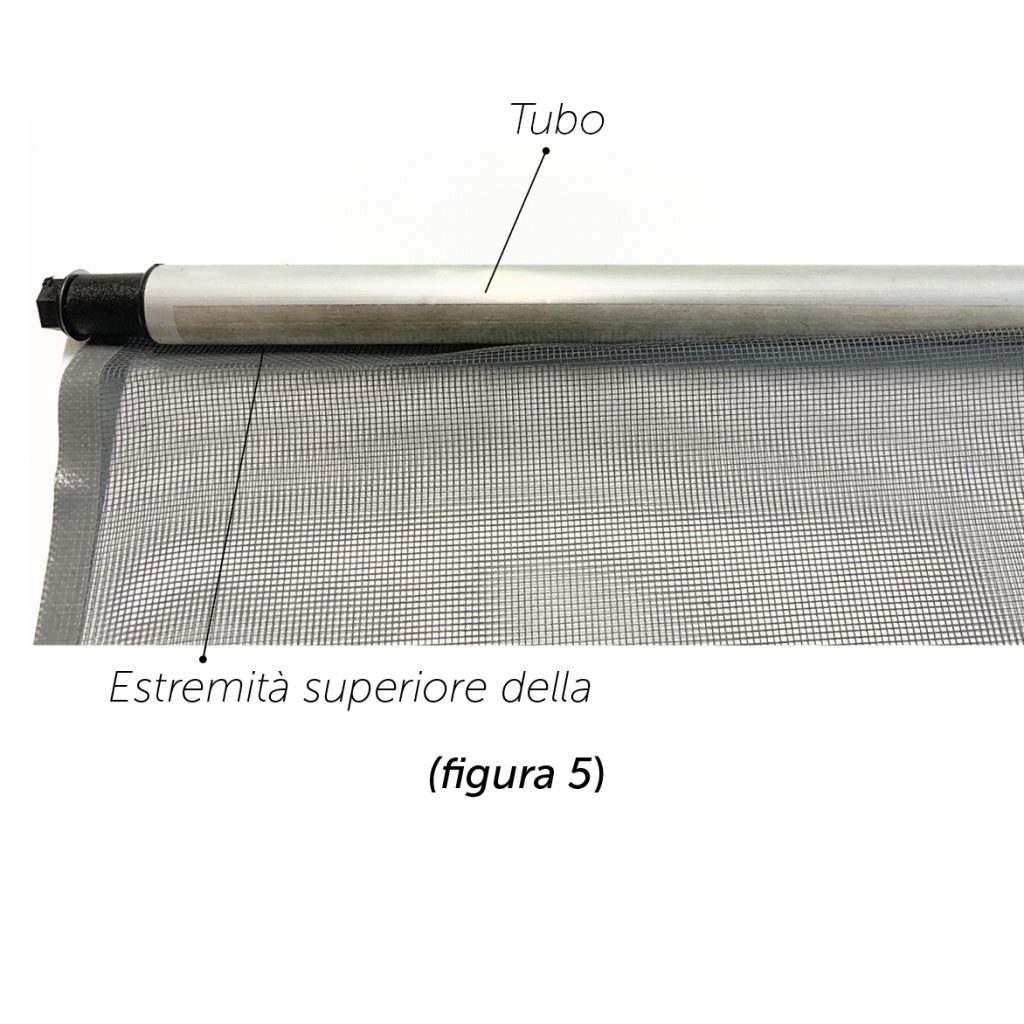
A questo punto sfilate tutto il tubo rete e profilo maglia dal cassonetto (figura 4), staccate la rete dal tubo (figura 5).
Nella parte inferiore la rete è agganciata al profilo maniglia (Figura 6).
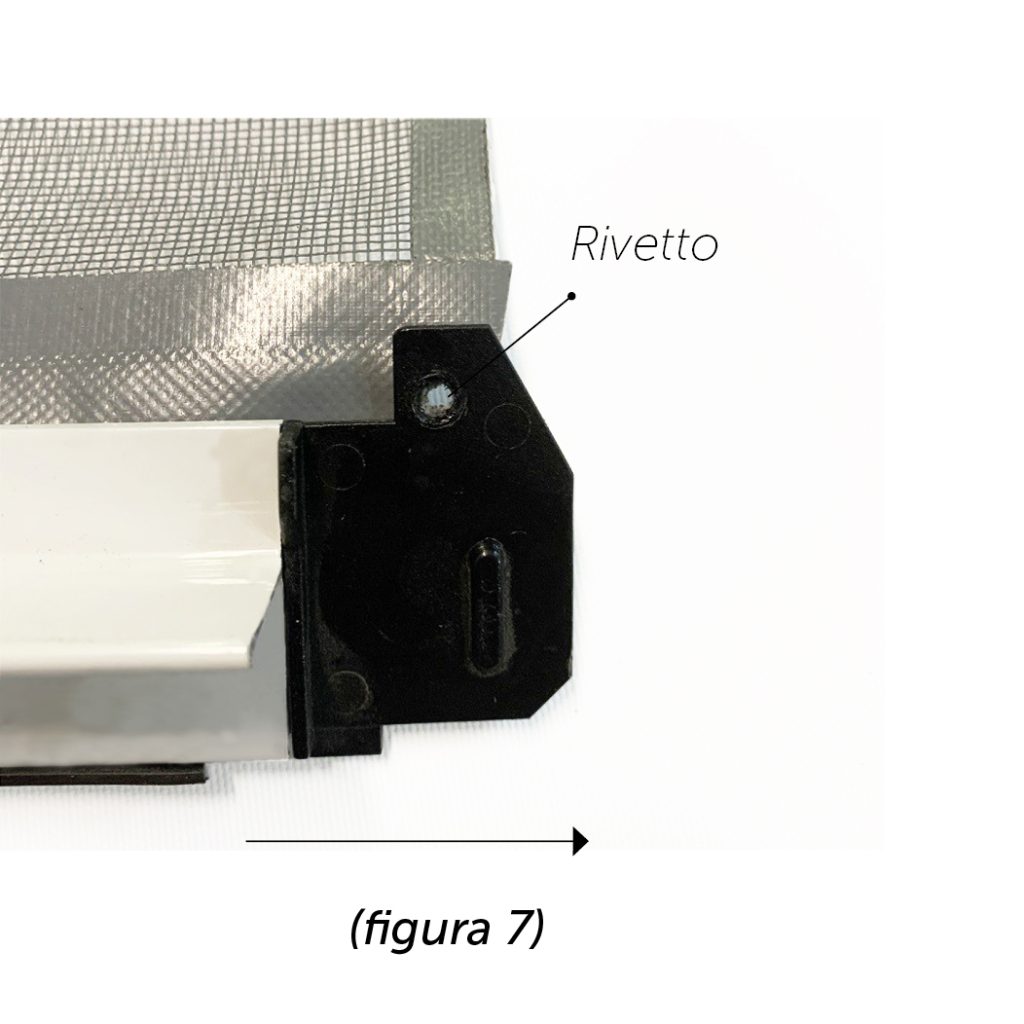
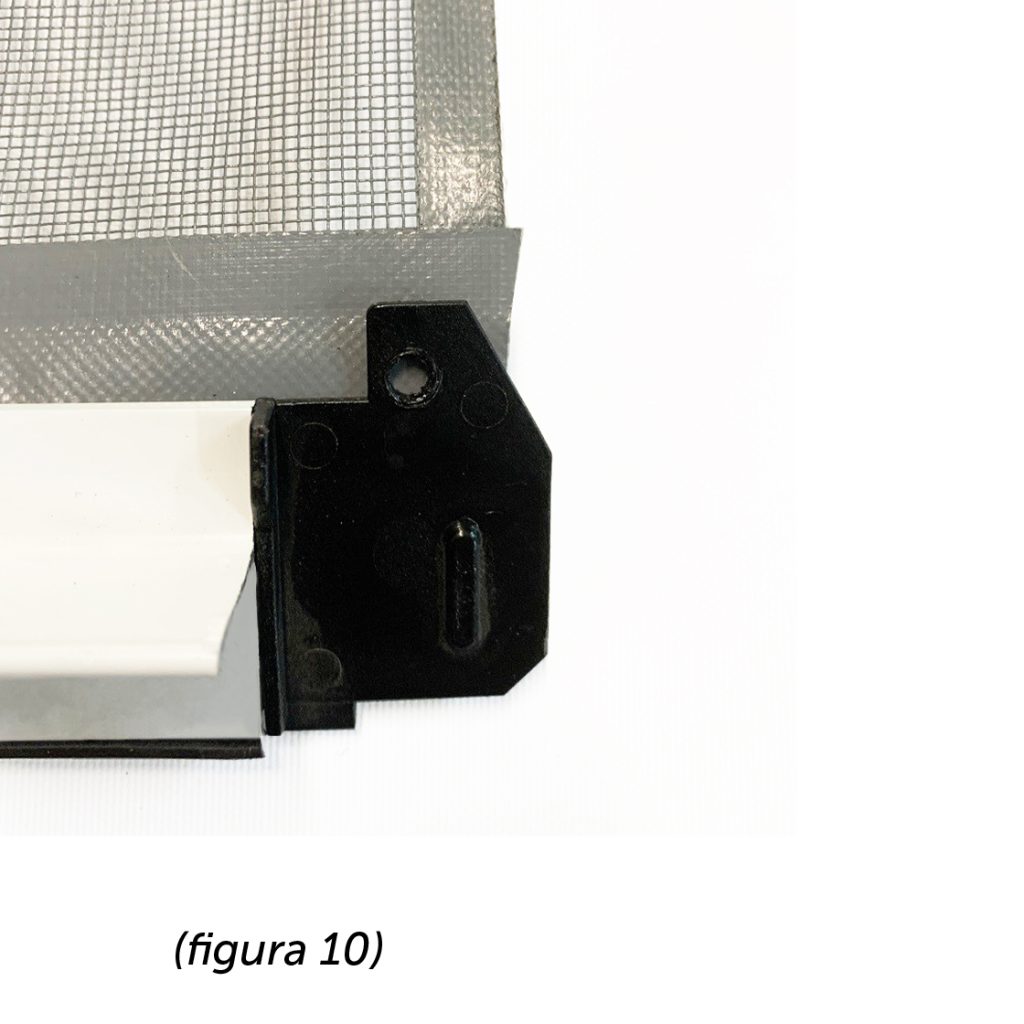
Ai lati del profilo maniglia sono presenti due accessori di plastica, chiamati scivoli, che si fissano alla rete con due rivetti. Occorre togliete i rivetti dagli scivoli con un piccolo trapano e poi estrarre gli scivoli stessi dal profilo maniglia. Fate attenzione a non gettare gli scivoli perchè serviranno nei passaggi successivi (figure 6 e 7).

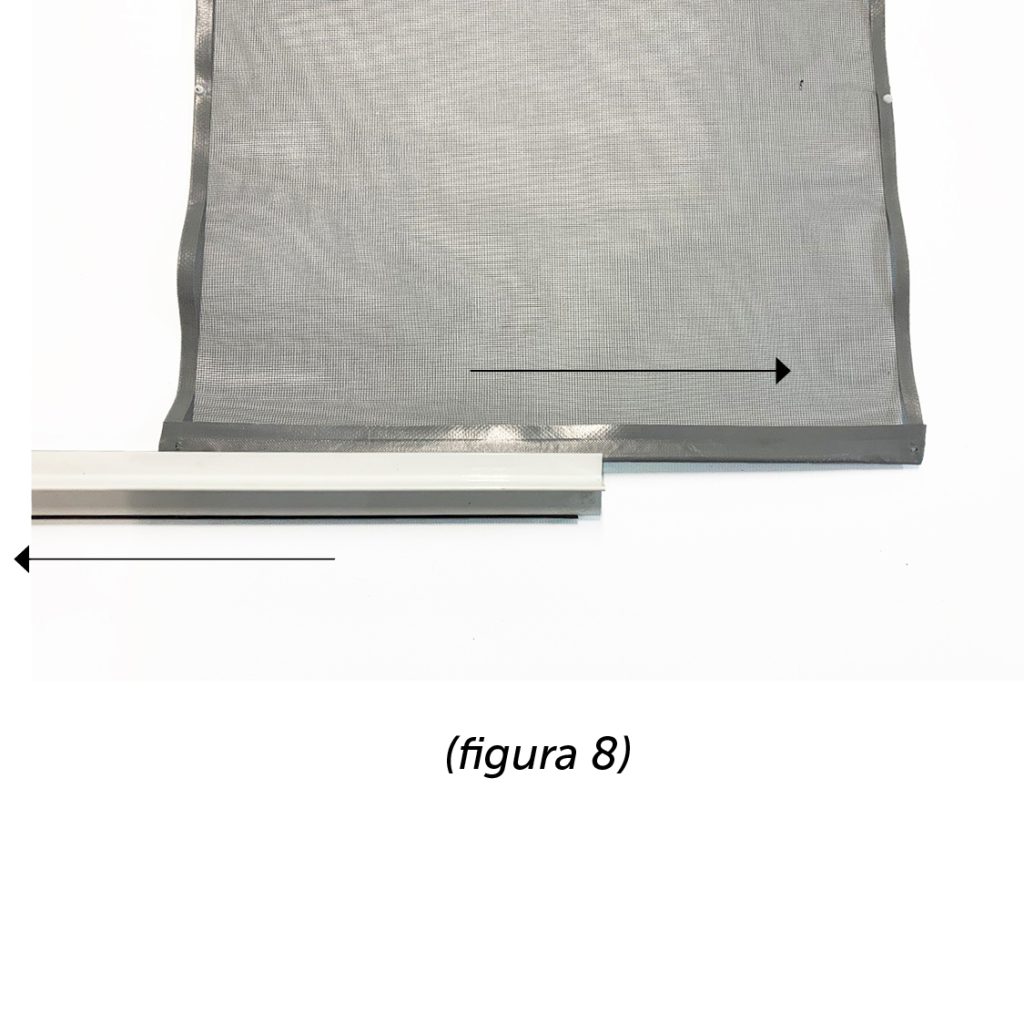
Adesso bisogna sfilare la rete dal profilo maniglia, prestando molta attenzione (figura 8).
Si passa poi all’azione successiva che consiste nello sfilare il tondino dalla tasca della rete (figura 9).
NB: Il tondino non è presente in tutti i modelli, laddove manca, si consiglia di acquistarlo come optional.

Per il montaggio della nuova rete basta eseguire al contrario i passaggi precedenti quindi:

 +39 393 8909 241